Soap making can be a daunting task to undertake. So many moving parts that seem unrelated but so necessary to making a good safe bar of soap. The cold process technique of soap making can be overwhelming to many new soap makers and rightly so. The main fear comes from the thought of having to handle sodium hydroxide also known as lye or caustic soda.
I can attest to this fear of soap making but I must also implore you not to feel apprehensive and let that nervousness hinder you from making the best soap of your life. After breaking through my personal barrier of fear with dealing with lye I took the leap and learned the technique of cold process soap making.
I can inform you that after your third or fourth time making soap you will be come so exited that you will wonder what you were so nervous about. Its really not as bad as it seems granted that you observe the safety precautions and use the appropriate equipment.
As a novice myself I thought it best to help my fellow newbies discover the joys of cold process soap making at home by developing a step by step list from start to finish of how to safely make your own soap.
Table of Contents – find what you need
Step 1 – Overview and history of cold process soap making.
Having an understanding of how cold process soap can be an exiting craft to undertake will help you in your journey to soap making. This method of soap making is the most versatile and unique compared to hot process and melt and pour soap making.
Using the cold process method, also called CP soap making, you will learn to unleash your creative side and experiment with every aspect of your soap technique.
Soap making has been around for thousands of years. There are many stories about which civilization was the first to use soap and how they came upon the substance. The best story and oldest I would imagine is the story from Egypt. That a formula was written that produced soap. Some may argue with this and state that there is an even older text.
Its said that during ancient times in Babylonia that soap was used not only for washing clothing but as a form of medicine. What ever the origin we thank them today that we have learned good hygiene and can enjoy the process of soap making.
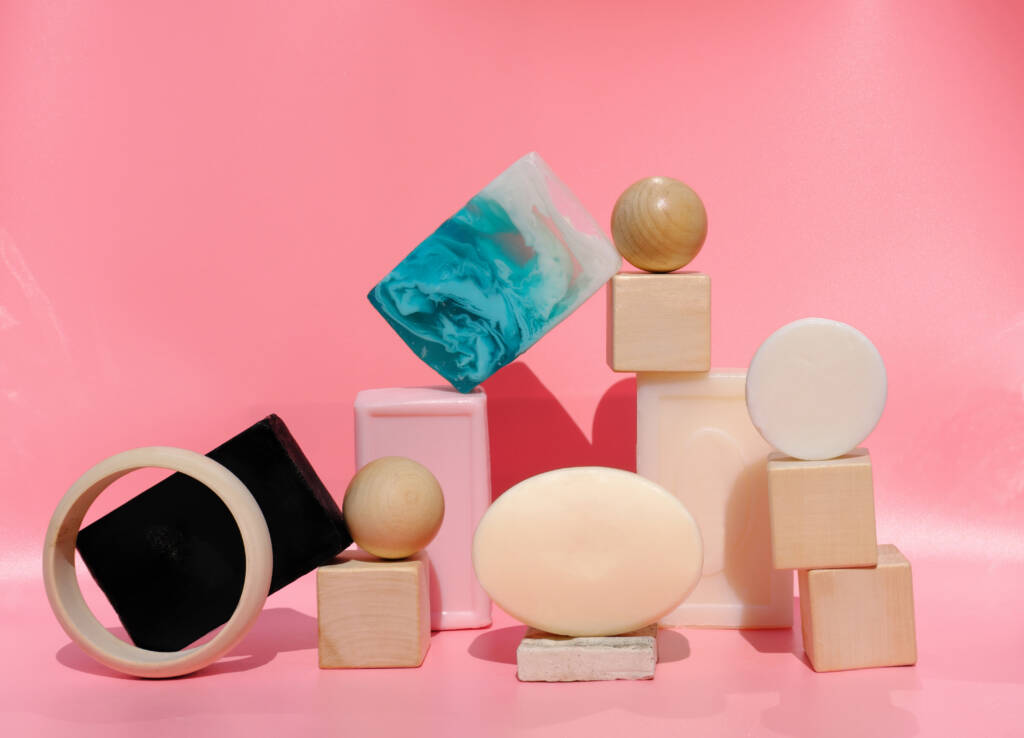
Beyond its practical use, making soap and especially the cold process method, allows the maker to express themselves creatively by using special tools and techniques to make colors blend or swirl, layer and formed into various shapes.
This is the most exciting part to cold process soap making. The ability to express yourself and make a truly unique bar of soap.
Step 2 – Inspiration – Deciding what style or design of cold process soap to make
Deciding what you will make will help you in the planning phases of soap making. There are so many options to choose from that I will try my best to give the general types of techniques used in cold process soap making.
I have found that many of the techniques involved can be boiled down to three main categories. Layered, Swirl and embed soap techniques. From these three techniques there are many sub categories and even more when you combine them together.
Layer soap
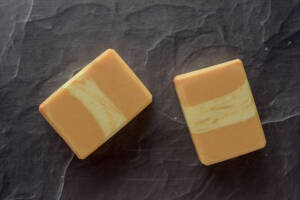
This is where you will have various layers often colored differently to show case a stripped bar of soap. Depending on the way you display it you can have vertical or horizontal stripes in your soap. Layered soap technique can be expanded and combined with other soap methods to develop unique looking soap such as flags.
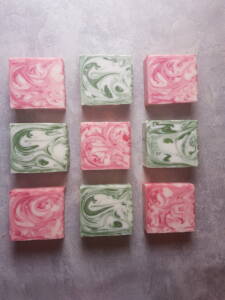
Swirls
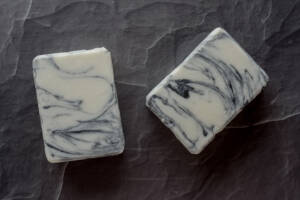
Mixing two or more colors together in a randomized or sometimes controlled pattern. This creates those beautifully designed soaps with multi colors and abstract designs. Swirls perhaps make up the most widely used technique than any of the three techniques.
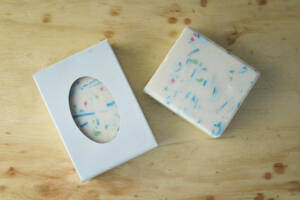
Embed
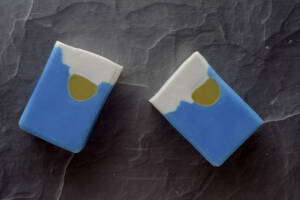
Embed soap is the process of adding an already completed soap to your new soap mix. Embeds can give your soap a contrast by placing geometric shapes or other shapes to your soap. The beauty of embeds is that it does not have to be all the same type. You can use small pieces of used soap, melt and pour soaps and so much more.
There are just too many techniques involved in cold process soap making to post them all here.
Step 3 – Cold process soap making safety you need to know
This is where the rubber hits the road or I guess where cold process soap making begins. I cannot stress the importance of being safe while soap making. Using the proper safety gear will also help illuminate your fear or nervousness of using lye.
Please take time to read, understand and memorize this portion of the 10 steps to cold process soap making as this is by far the most important part of the process. For more information on each part you can go deeper by reading this article What supplies do i need to make cold process soap.
Safety brings first aid to the uninjured.
F.S. Hughes
Gloves
Gloves, not the ones you use during winter nor your leather riding gloves but safety rubber gloves. Working with lye and other substances that you do not want to get on your skin requires this safety measure.
As a beginner I recommend using the dish washing rubber gloves that reach half way between your wrist and elbow. Thee are thick enough and long enough for you to practice your soap making and make some minor mistakes without being harmed.
Working with Lye water that can reach temperatures of well over 100 degrees Fahrenheit is something to keep in mind. Mixing your lye water requires some concentration as spilling one pearl of lye can cause your skin to itch as the lye reacts with sweat.
Working with some fragrances synthetic or essential oils undiluted can also cause mild irritation to the skin. Its best to keep your hands protected from these substances.
Googles
Eye wear… Protect your eyes. We only have one pair and a plop of lye water or hot soap batter to the eye could cause some serious damage.
I am not here to scare you but let you know that by taking these precautions you can avoid unnecessary visits to your emergency room and deter you from soap making.
Wearing safety goggles is always a good idea and the good part is you can look as cool as you want or as mad soap scientist as you prefer.
Clothing
Long sleeve shirt, long pants and closed toe shoes are the go to dress when soap making especially with cold process soap making. The long sleeves help just in case during the mixing process lye water or soap batter accidentally splatters on your arms.
One of the worst case scenarios would be that while mixing your lye water the container breaks. Wearing long pants and closed toe shoes will prevent the substance from burning your skin. This is a dreadful thought however in the vein of safety it has to be discussed.
I have personal experience container breakage however in my case it was contained within another more durable container and disaster was averted.
Children and pets
This should go without saying but I will state it just in case.
Keep children and pets away from your soaping area. There is no telling what may happen when they are around. Even worse a child my try to put their hand in the soap batter especially if you are making a chocolate soap and using a chocolate fragrance. The batter can look like icing and it smell amazing.
While protecting yourself make sure you protect others around you.
Step 4 – Cold process soap making equipment you need before you start.
Once you have all your safety gear in place it is time to take a look at the equipment you will need to make your soap. Soap making requires tools and equipment to make the process better and easier. For more information on each part you can go deeper by reading this article What supplies do i need to make cold process soap.
Soap molds
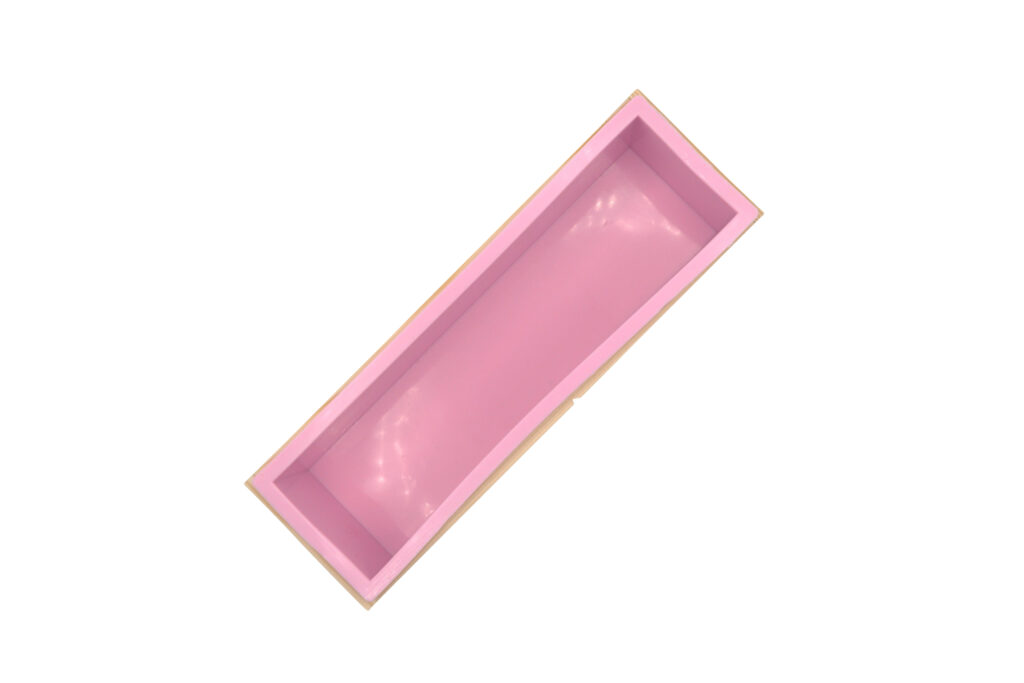
Molds come in many shapes and sizes of which any molds are designed specifically for soap making while molds for baking have been used to make soap. There are DIY soap molds made from old milk cartons, potato chip containers and much more.
Deciding on what mold you will use is not important at the beginning of your journey in soap making. I advise you to start off with two mold types. A 6 cavity separate soap mold and the standard 42oz loaf soap mold. These two mold types will help you to use many of the other shapes and sized molds out on the market.
Stick blender

A stick blender is usually used in the kitchen to puree fruits and other foods. It was found useful for blending lye water and fats together to cause the process of soap making to begin. You may know the sick blender by one of its other names;
- immersion blender
- hand blender
- wand blender
- mini blender
- grind blender
In soap making a stick blender is invaluable its a must. Well maybe not a must as you can use a whisk to blend your ingredients together. Unfortunately the hand process could take you a few hours, about 5-10 of continual stirring.
To learn more on the best stick blender to use take a look at this article How to choose a stick blender for soap making.
Scale
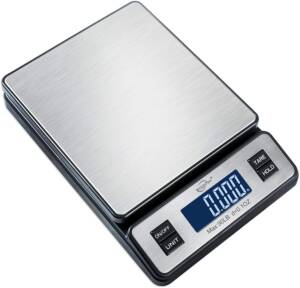
Not talking about fish scales but food grade measuring devices used to weigh things. Depending on where you are in the world you will want a scale that gives readings in grams or ounces. I personally use ounces and pounds.
Just make sure the scale is large enough to hold your container. We will talk shortly about choosing the right container for soap making.
Starting out you can use a scale that displays up to 1 decimal place but as you get deeper into your own recipes you will want one with two decimal paces to be more precise.
Containers
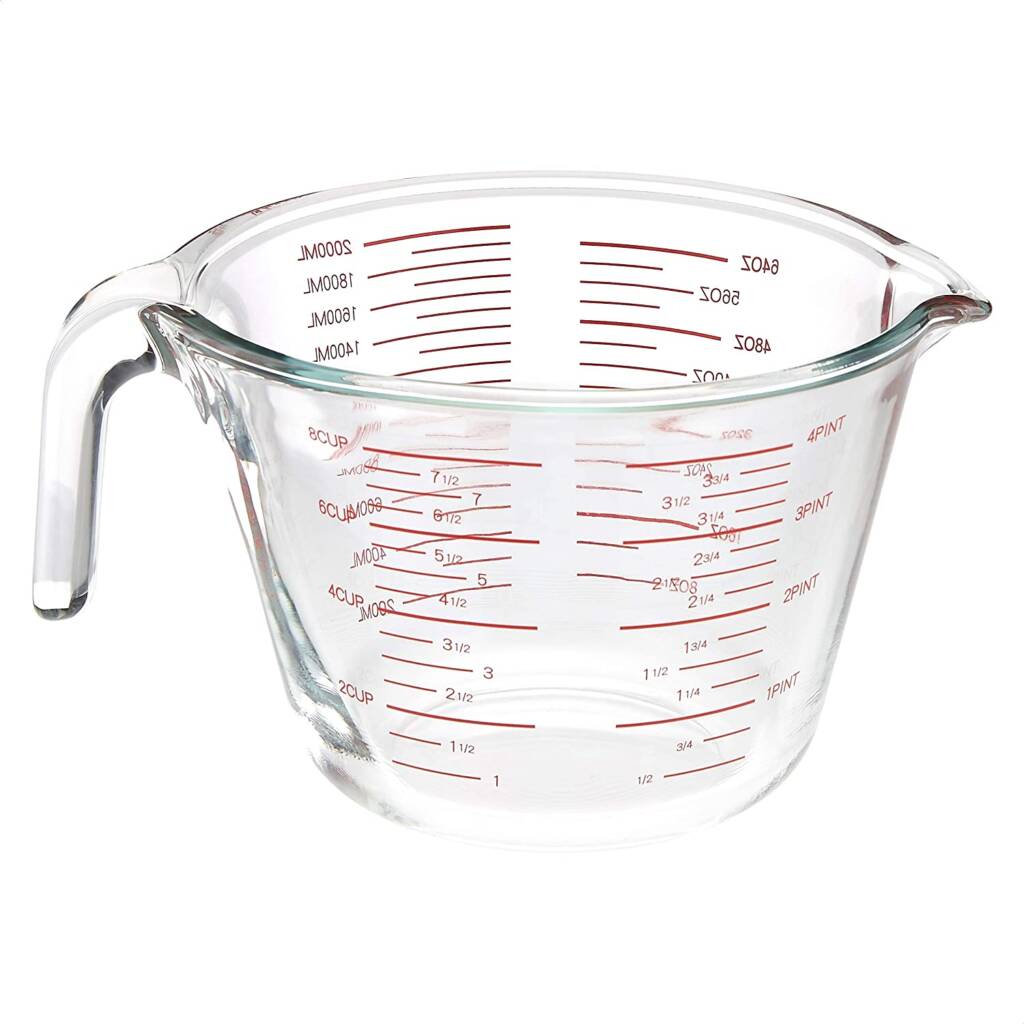
Containers used in soap making should be made to withstand temperatures up to 200 degrees Fahrenheit. Some of the processes utilized in cold process soap making involve handling super heated substances.
Depending on you recipe and lye water mixture you can have your mix reach up to 200 degrees F easily. Use heat tempered glass containers such as pyrex, steel containers or industrial plastic containers rated to withstand heat.
Do not assume that food grade containers that are rated to be microwaved can be used to mix lye solution or hold your soap batter. Its best to be safe than sorry and have your container melt in front of you.
By all means DO NOT use aluminum anything when soap making. Lye and aluminum do not have a good working relationship with each other. A chemical reaction will occur when ever the two meet and produce hydrogen gas. If you are wondering, yes hydrogen gas is extremely flammable. the good news is that it can rise quickly dispersing into the atmosphere before igniting.
To learn more on the types of containers to use take a look at this article, What are the best containers for soap making?
Spatula
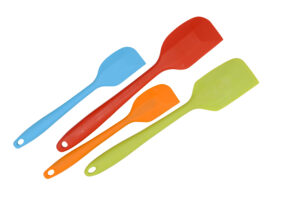
The spatula is one tool you cannot do without. It can be used to help mix your lye solution and to mix your soap batter. There are many types of spatulas on the market but I recommend you stick with the silicone spatulas. These are versatile and can withstand the heat of lye water and soap batter.
Another good point about silicone spatulas is that they can be colorful or bland which ever you prefer.
Whisk

The whisk can be seen as not important but I found it to be indispensable when it comes to mixing my water and lye solution.
Yes a silicone spatula can be used however depending on the the size of your lye water container you may not have enough room to swirl your lye and water. A whisk on the other hand agitates the solution and helps the lye dissolve into the water easily.
WARNING using any type of spatula is not recommended. As stated before aluminum and lye do not work well with each other so you want to AVOID using an aluminum spatula at all cost. Some silicone wrapped whisk may have aluminium as its frame, again I recommend you stay away from these types.
Thermometer

The handy dandy thermometer is some what of a need that you don’t really need. Here is what I mean. The thermometer is used to keep track of your lye water mix temperature as well as your oils and soap batter. It can be used to monitor the chemical reaction of sapoification of your soap batter in its mold as it heats up.
As useful as the thermometer is over time of making the same type of soap you tend to know the recipe and technique well enough not to use it.
I must caution you on this matter as your home temperature is not always the same hence the surrounding temperature can and will affect your ingredients and your soap making process. It is good to keep a thermometer handy.
The laser thermometer is easiest to use and it is quicker than others.
Extras – mini mixer
Mini blender can refer to a stick blender but also to a small hand held blender that is uses to mix colors and other additives.
I have found this mixer to come in very handy when adding color to my soap and you will be glad you have it with you as well.
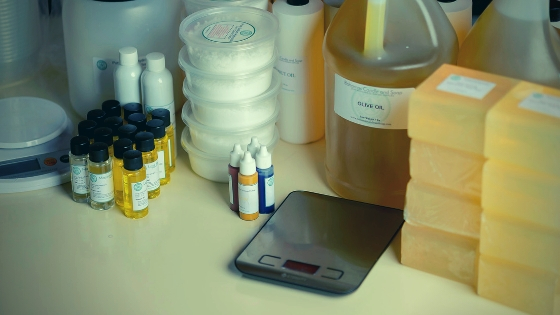
Step 5 – Cold process soap making ingredients that make all the difference.
The ingredients you can add to your cold process soap is a very long one. I will only mention a few here with links to more information .
Lye
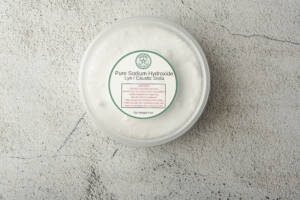
Sodium Hydroxide (NaOH) is the alkali that is made soluble in distilled water or other liquid that is then combined with fats (triglycerides) to form soap. There is no soap making without lye and when your soap has completed the saponification process there should be no lye left over in your soap.
Knowing the right amount of lye needed in your soap is where that scale comes in handy. A soap calculator is able to assist you in determining how much lye will be needed to convert the various types of fats into soap and leave not lye in the final product.
Lye comes in two main types, flakes and pearls. Either is fine but avoid using drain cleaning products that contain lye, they contain other substances you may not want on your skin.
Water or other liquid
Water is used to dissolve the lye. When making your lye water the solubility of lye in the water makes it easier to combine with the fats from your oils to make soap. A good notation here is that water is not the only solution that can dissolve lye and still work.
To learn more about what liquids you can use other than distilled water for soap making visit this article. Is distilled water needed to make soap?
WARNING Water is still the best liquid source for mixing your lye
Soapers have used, wine, beer, milk, aloe juice and other liquids to mix their lye. Each of these have their drawbacks and special technique to dissolve the lye. Wine for example requires you to boil off the alcohol first, then freeze the wine in cubes and then add the lye slowly to have the wine ice melt and mix with the lye.
Using other liquids are possible but can be time consuming. Use distilled water to be safe.
Oils and fats
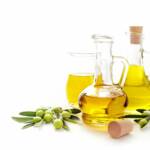
Oils, butters and fats all contain various types of triglycerides. It is these molecules that bind with lye to form soap. Without these fats there can be no soap.
Notice I gave three types. Oils which are often vegetable oils like olive, coconut or sweet almond oil. Butters which include shea, cocoa and mango butter and fats as in animal fats such as tallow and or lard.
Each oil, butter and fat has its own way of turning into soap, some create a hard bar while others make a conditioning bar. It all depends on which of these fats are used to make your soap.
Colors
Colored cold process soap can be made in a various ways but there are three main ways in which you can add color to your soap.
- Mica
- Oxides
- Spices
Mica and oxides are have some bases in nature but their processing causes many persons to consider neither of them to be natural.
There are many colors to choose from with it comes to micas and oxides. Spices on the other hand is more of a natural way to color your soap. Spices like turmeric, black walnut powder, mustard seen and others have been used to color soap naturally.
Fragrance
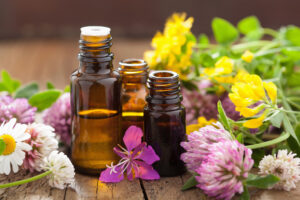
Adding fragrance to your soap is a personal preference all depending on what you like. What you will have to decide upon lies between using fragrance oils or essential oils.
Fragrance oils are artificial scents that have been developed in a lab to mimic many other scents such as raspberry or as unique as cotton candy.
Essential oils however are extracted from plant matter to produce a scent that may or may not have benefits to your skin.
Whichever scent you decide to use in your cold process soap remember that it will either enhance the bath experience or reduce it. Learn more about adding fragrance to your soap at this article. How to add fragrance to cold process soap.
Additives
Additives are not as cut and dry as it seems. Fragrances are sometimes considered additives as are mica and oxides. This is not wrong as anything you add to your soap beyond lye water and fats is considered an additive.
Additional additives can be poppy seeds, grounded coffee beans, oatmeal, botanical matter or anything that is expected to increase the experience of bath time.
You can find many list on line for various soap additives.
Step 6 – How to develop cold process recipe
Having your safety gear in place, the right equipment and good information about the ingredients you can use its time to develop your cold process soap recipe.
Soap Calculator
The use of a soap calculator is an invaluable assent when it comes to designing your own soap recipe. The calculator will ensure that you use the right amount of lye to successfully convert the types of oils to soap effectively.
Without a soap calculator you can run the risk of making a very unsafe bar of soap. An example of this is if you use 4.5oz of lye in a recipe for let say coconut oil this does not mean that the same 4.5oz is needed to convert olive oil to soap. The more oils you use the more a soap calculator is needed.
Check here for more information on how to use a soap calculator
oils characteristics in cold process soap making
Each oil, butter or fat you use has a characteristic that translates into your final soap. Its good to take note of these characteristics when making your soap. The main points are;
- Bubbly lather
- Creamy lather
- Soap hardness
- how conditioning is your soap
- How cleansing is your soap
Knowing the properties and characteristics of the oils, butters and fats you use to make your cold process soap will help you make specific soaps that perform a specific task.
Step 7 – Preparation for cold process soap making
How you prepare to make your soap makes all the difference. Preparation combines all of what you have learned this far and brings it all together with one more point.
Know what you are going to make, what ingredients you will need. Ensure you have all your safety gear and all the equipment needed.
The final portion of your preparation is to actually set your work station up in a way that everything you need is at hands reach. I am right handed so I set my workstation to have my stick blender, spatula and whisk to my right.
I have light weight items such as fragrance, lye water and additives to my left. My scale is in front of me my mixing bowl is in the middle and at the top is my soap mold.
Setting up your workshop to ensure these items are at hand makes your work easier. You do not want to be in the middle of mixing to trace and find out that you do not have the additives you need for your soap.
Step 8 – Cold process soap making techniques that you should make a habit of using.
Once your work station is set and ready with all that you need within arms length, its time to combine your ingredients and get into soap making
Lye mixture
I find that mixing the lye mixture first is a good practice. Depending on how serious you get into cold process soap making it will depend how soon you begin this process. Mixing you lye and water ahead of time gives the super heated solution time to cool down. This helps in preventing disasters such as volcanoing or cracking of your soap.
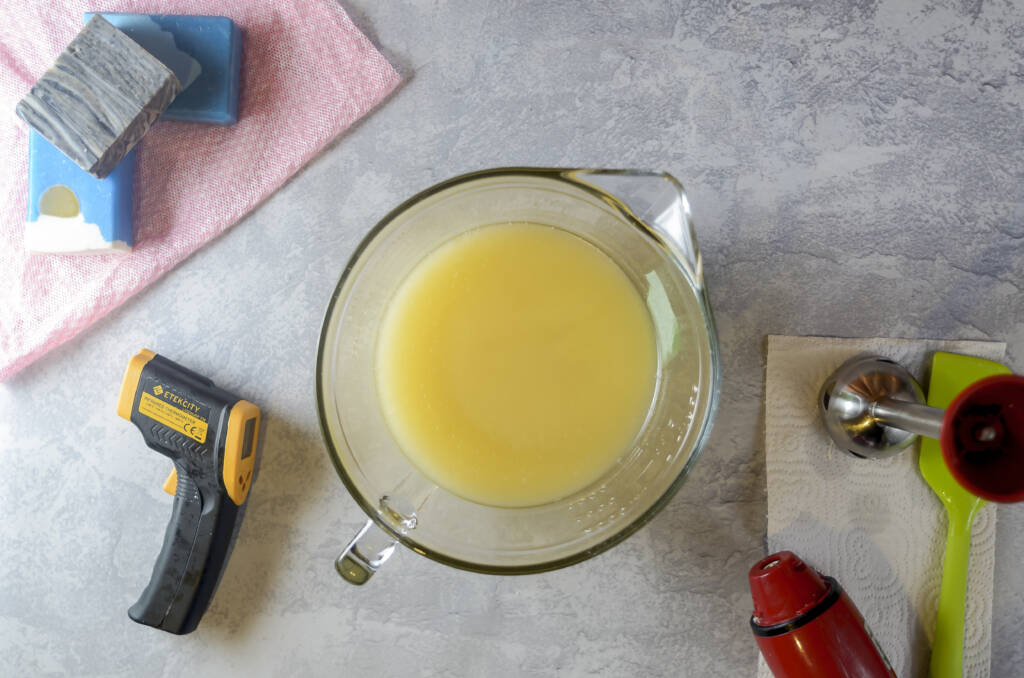
Oil mixture
While your lye mixture is cooling down you can begin to combine all your base oils together. The more oils you are combining the more you should be careful of your measurements. A good notation here is to have smaller containers that you can measure out each of your oils.
An advanced oil mixture technique is to add the largest oil to the mixing bowl first then subsequently reset the scale and add other oils being very careful to watch the weight of each oil.
This can save on containers but mistakes can happen. Remember you can add but its hard to remove an oil once its added so if you over pour your recipe will have a slight deviation.
Fragrance
Fragrance added to your cold process soap can be an actual fragrance made in the lab by scientist or an essential oil extracted from plant matter. Which ever you choose it good to note that there are two way to add scent to your soap
The first method involves adding your scent to the base oils. This is the standard way of adding a scent to your soap but this method will depend on the actual fragrance. Not all scents behave well in cold process soap. One way a scent may misbehave is by accelerating trace. This will reduce the time you have to work on your soap batter before its time to pour.
Another method of adding scent to your soap is to add it at light trace. This way you can pour your fragrance in the soap batter and incorporate it using a whisk.
Learning the nuances of adding a scent to your soap comes over time but it also comes with knowing if the scent will behave well or not.
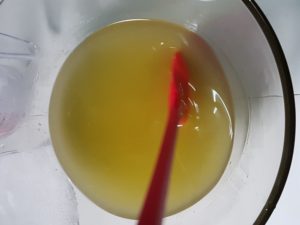
Color mixture
Color is an easy add to soap. If we are considering a bar of soap that is just one color then adding color at light trace is easy. However much like adding a scent, the color can also be added directly to the base oils.
Adding color at trace is a good technique to learn as you will need this skill when it comes to making swirls and layers.
Cold process soap making achieving Trace
Trace… what is trace? Well to sum it up its that point when your base oils have been successfully combined with your lye water. Its the beginning of the saponification process. It also determines how thick or thin your soap batter is.
Thin trace is just that thin enough to pour smoothly. Thick trace can be to a point where you have to scoop the soap batter out of the mixing bowl into your mold. No trace is better or worse than each other it just depends on what you are making.
Step 9 – How to cut and cure your cold process soap
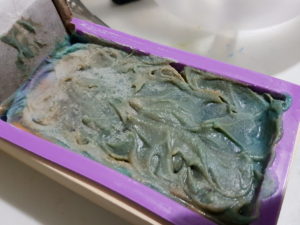
Un-molding
Once you have successfully placed your soap batter in your mold, the chemical process of turning oils, fats and butters into soap begins. This chemical process can usually take up to 24 hours depending on the oil types used.
It is at the end this 24 hours that your soap will have hardened enough to be removed from the mold. Caution again depending on the oils used 24 hours may not be enough. A quick test to find out if your soap is ready to be un-molded is to gently press on the side of the mold or in the case of individual molds press down on the top of the soap.
if your finger can depress the soap easily then your soap is not ready to be un-molded. Give it another day. There are other ways to speed up this process you can find more about un-molding soap HERE.
To un-mold your soap, peal away the silicone from the soap being careful at the edges not to bruise or dis form them. Most molds tend to have a sort of suction at the bottom of the mold holding the soap. By pressing down on the bottom to release this tension will make un-molding easier.
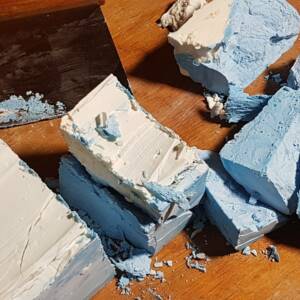
Soap cutting
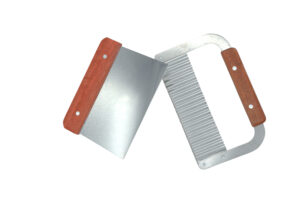
Having a 3 pound loaf of soap to use in the shower is not practical at all. So to make your soap more managable you will want to cut it into bars.
Soap cutting can be done with any number of tools. The most common are a wire soap cutter, metal hand soap cutter or knife typically not the very sharp ones but one semi sharp enough to cut through the soap.
For the standard 10 inch soap mold you can cut your soaps into 1 inch thick slices that will give you 10 bars roughly 4oz is weight. This is the standard size and weight of handmade soap.
Soap curing
To cure your soap simply means to have your soap loose some water weight. Thats right the water you used to make your lye water will slowly evaporate from your bar of soap making it a harder bar and one that will last longer when in use.
Although there are some soaps that will still be undergoing the saponification process, depending on how early to un-molded your soap, the curing process is mainly to produce a stronger bar of soap. For an extreme example a 100% olive oil soap also known as a castile soap can take up to 1 year to cure and be hard enough to use practically in the bathroom with out melting from shower steam.
Just remember to place your bars of curing soap out of the way and in a cool dry place away from direct sunlight. The standard time for curing is three to four weeks. Yes this is a bit of a wait but it will be well worth it in the end. There is a recipe that you can use to make soap that requires less time find out more HERE.
Soap testing
Testing your soap is not talked about enough in the handmade soap genre but it is something you should consider. Testing your soap to ensure that your recipe works and you have made a bar that you can be proud of is very important.
Another reason to test your soap is to ensure that the ph balance is good. There is some debate on this but we wont discuss what ph level is best. Along side the ph balance you can do a simple zap test which will let you know if your soap is safe to use on your skin.
The Zap test is simple. You taste your soap. Yes that’s right place a bar of soap on the tip of your tongue. If you feel a tiny zap or prick like feeling this means your recipe is off and you still have lye present in your soap. Remember lye is needed to make soap but when the soap is made there should be no more lye left.
Testing will allow you to check and correct your soap recipes and also make sure yous soap is safe to use. Beyond the zap test if there is no feed back, take a shower with it to see how well it performs. Then take notes of what you like or dislike.
Step 10 – Cold process soap packaging, storage and usage.
Open storage
Storing your soap in the open air is quite alright. You can use them as decorations in baskets or trays that you have in your bathroom or just keep them stacked in a box or secure bin. Leaving them unwrapped will help them to continue to shed the water weight and get better with time.
Shrink wrap
Not everyone is happy about having their soap exposed to the open air. In this case an easy solution is to use the food grade cling wrap. This will give your soap a level of protection for extra moisture but it can slow the curing process. Its best to do this after the cure time has passed.
Another more professional way to store your soap is to use shrink wrap. Its a harder plastic that you place your soap in and use a heat gun to shrink the plastic over the soap. This is used more often if you plan to give your soaps away as gifts or even sell them. A label can be easily added to the shrink wrap.
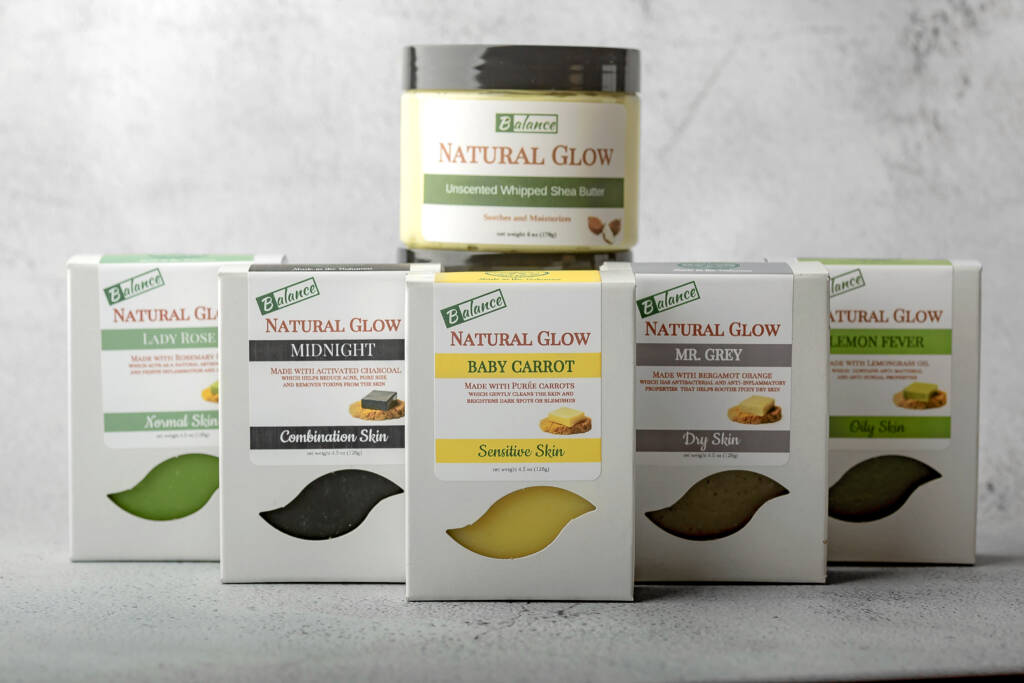
Soap box
The soap box is the most professional way to store your soap especially if you plan to sell them. There are many soap boxes on the market so take your time and see what may interest your.
Soap boxes still allow the soap to breath hence continue to reduce its water weight however a draw back unlike the shrink wrap is that an open box or packaged soap looses its scent faster than if it was wrapped with cling wrap or shrink wrap.
Shelf life
There is a shelf life for your soap. This is due to the ingredients of handmade soap. The biggest culprit to a short shelf life is the use of olive oil. Olive oil has a typical shelf life of 2 years. So even if you purchased the oil within a month of it being harvested, made a castile soap that took a year to cure you will have 1 year left in the life of the soap before the oils begin to go rancid.
When an oil is bad or is past its shelf life you will know by the smell of your soap. Olive oil in particular has a very distinctive smell when its gone bad. In fact you may have heard of the term DOS dreaded orange spots. This happens when the oils used in soap making have gone bad or rancid.
Typically the shelf life of your soap is about 6 months. If you are selling soaps its best to get them off the shelf within this time as you can never tell how old an oil is that you used.
What could go wrong with my soap
Mistakes can be and often will be made when making cold process soap. No matter how many times you make it there is bound to be something you forget. This is why organization and repetition is important. Do the same thing you did last time when it worked. This will help you alot in the long run.
False Trace
False trace is when your soap batter looks like it has been incorporated completely but in reality it has not. In this scenario its usually cool lye water and hard oils such as coconut oil or even butters. Cool lye will not heat up fast enough when added to the oils but instead the harder oils tend to solidify fast.
This gives the look of a good thick trace but in fact it just your oils re-solidifying. This will not make soap.
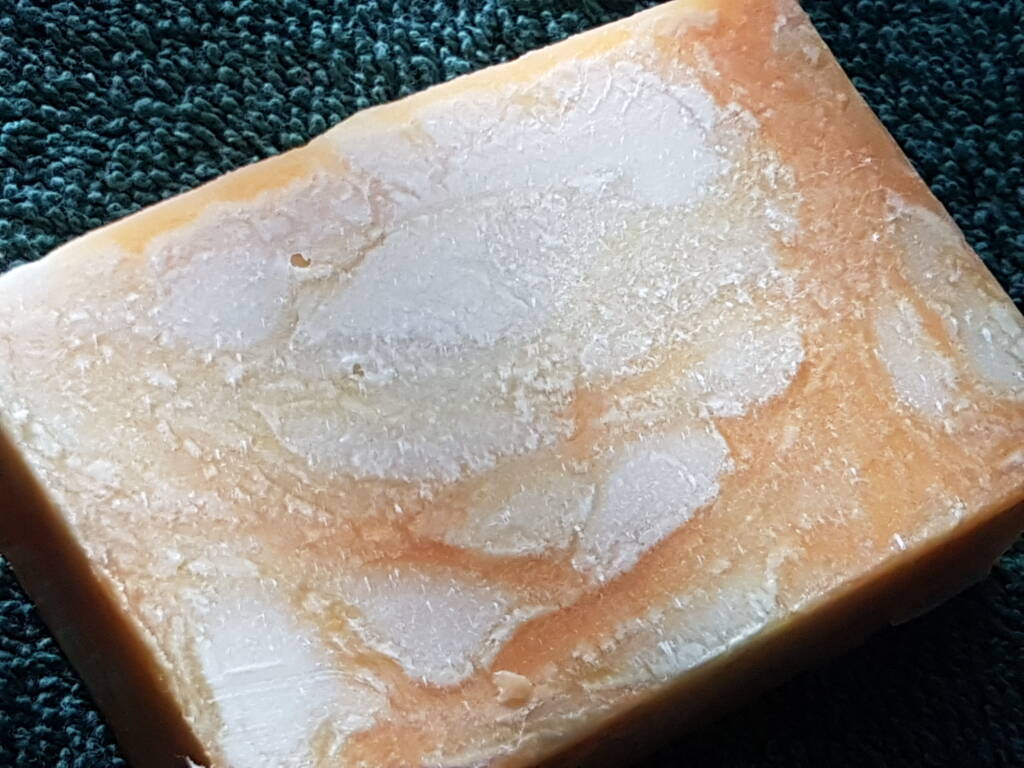
Glycerin rivers
Glycerin is a byproduct of the soap making process. Typically the glycerin is well blended in the soap and is not visible however… a common cause of glycerin rivers is the use of excess water.
The glycerin finds the path of least resistance and begins to clump together during the saponificaiton process. This creates the rivers you see. Its good to note that this is purely aesthetic as the soap is still good to use after testing.
Crumbling soap
A soap that just wont hold together is a major red flag. This is often due to your recipe having an excess amount of lye to oil ratio. This means that your soap is not good for using on you skin as there will most likely remain a lot of un-transformed lye and will burn your skin.
These mistakes can be salvaged by turning your excessive lye heavy soap into a detergent however the process to do that may be tricky and you could end up with lye on your clothing which will reach your skin. For that reason I will not discuss that option.
At this point if you notice your soap is very hard but crumbly it is a good sign that it could cause skin damage if used.
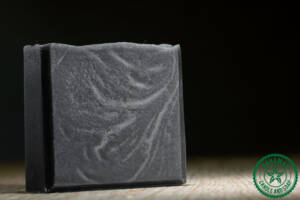
Soda ash
Soda ash is that white substance that forms on the top of your soap. Its harmless but just unsightly. There are a few reason why this may happen but its good to know that its an easy fix. You can find out more about soda ash HERE.
These are just a few but often the most common issues you may face when making cold process soap. The more you familiarize yourself with them and ensure you track and keep notes of all your recipes then you will learn a lot faster.
We hope you found this article helpful. If you were not able to find the information your needed from this article please do not hesitate to contact us and request more information.
Happy soaping and we wish you all the best.